30 watt LED Bench Light

Several months ago I bought a set of 10W LED modules like this:

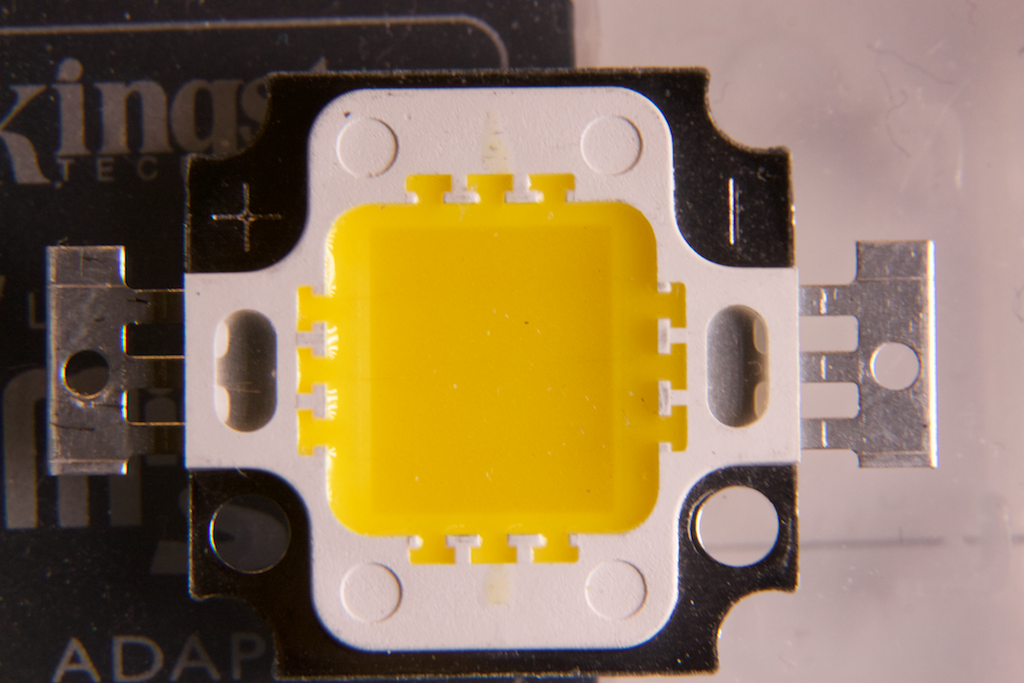
They have a multi-chip configuration, with an array of LEDs embedded in the center phosphor part. These units come in various voltages; the ones I got were ~30V. I designed a quick constant current circuit that runs off of a ~35VDC supply (open circuit, ~30VDC under load):

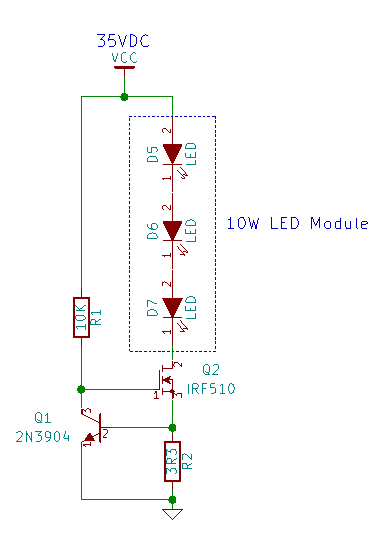
The constant current circuit is a simple N-channel MosFET with sense resistor feedback (using the 2N3904 to control the ‘FET). Knowing that there will be an ~0.6V drop between the NPN transistor’s base and emitter, we can calculate V=IR, or V/R = I, which gives us 0.6/3.3 = ~0.181A or 180mA through the LED module.

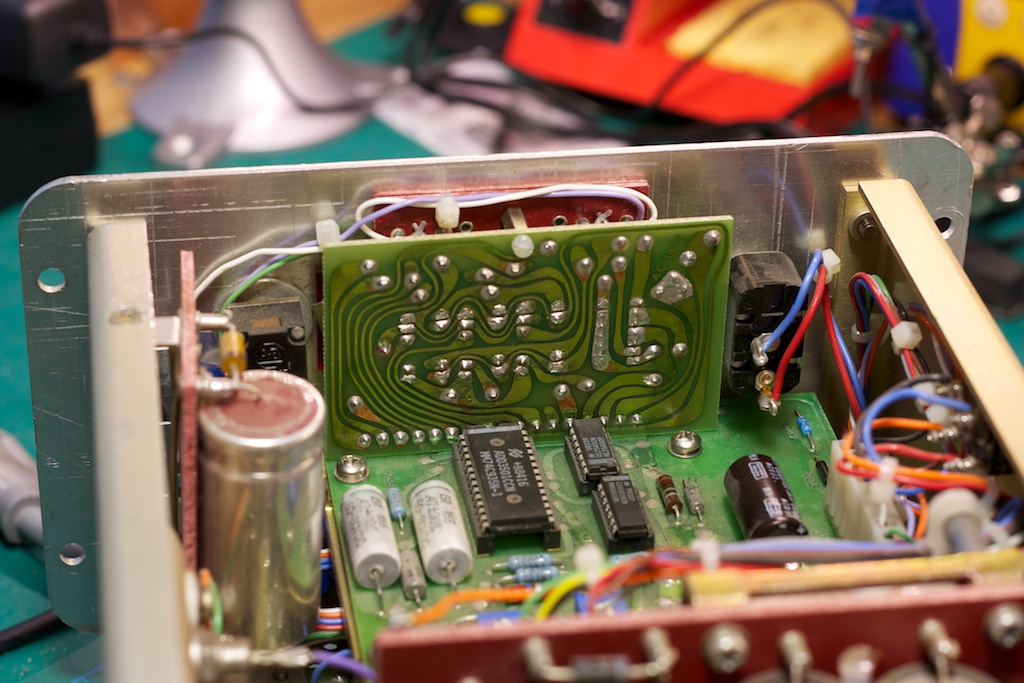
Here is a photo of the built circuit (there are 3 of them, one per LED module):

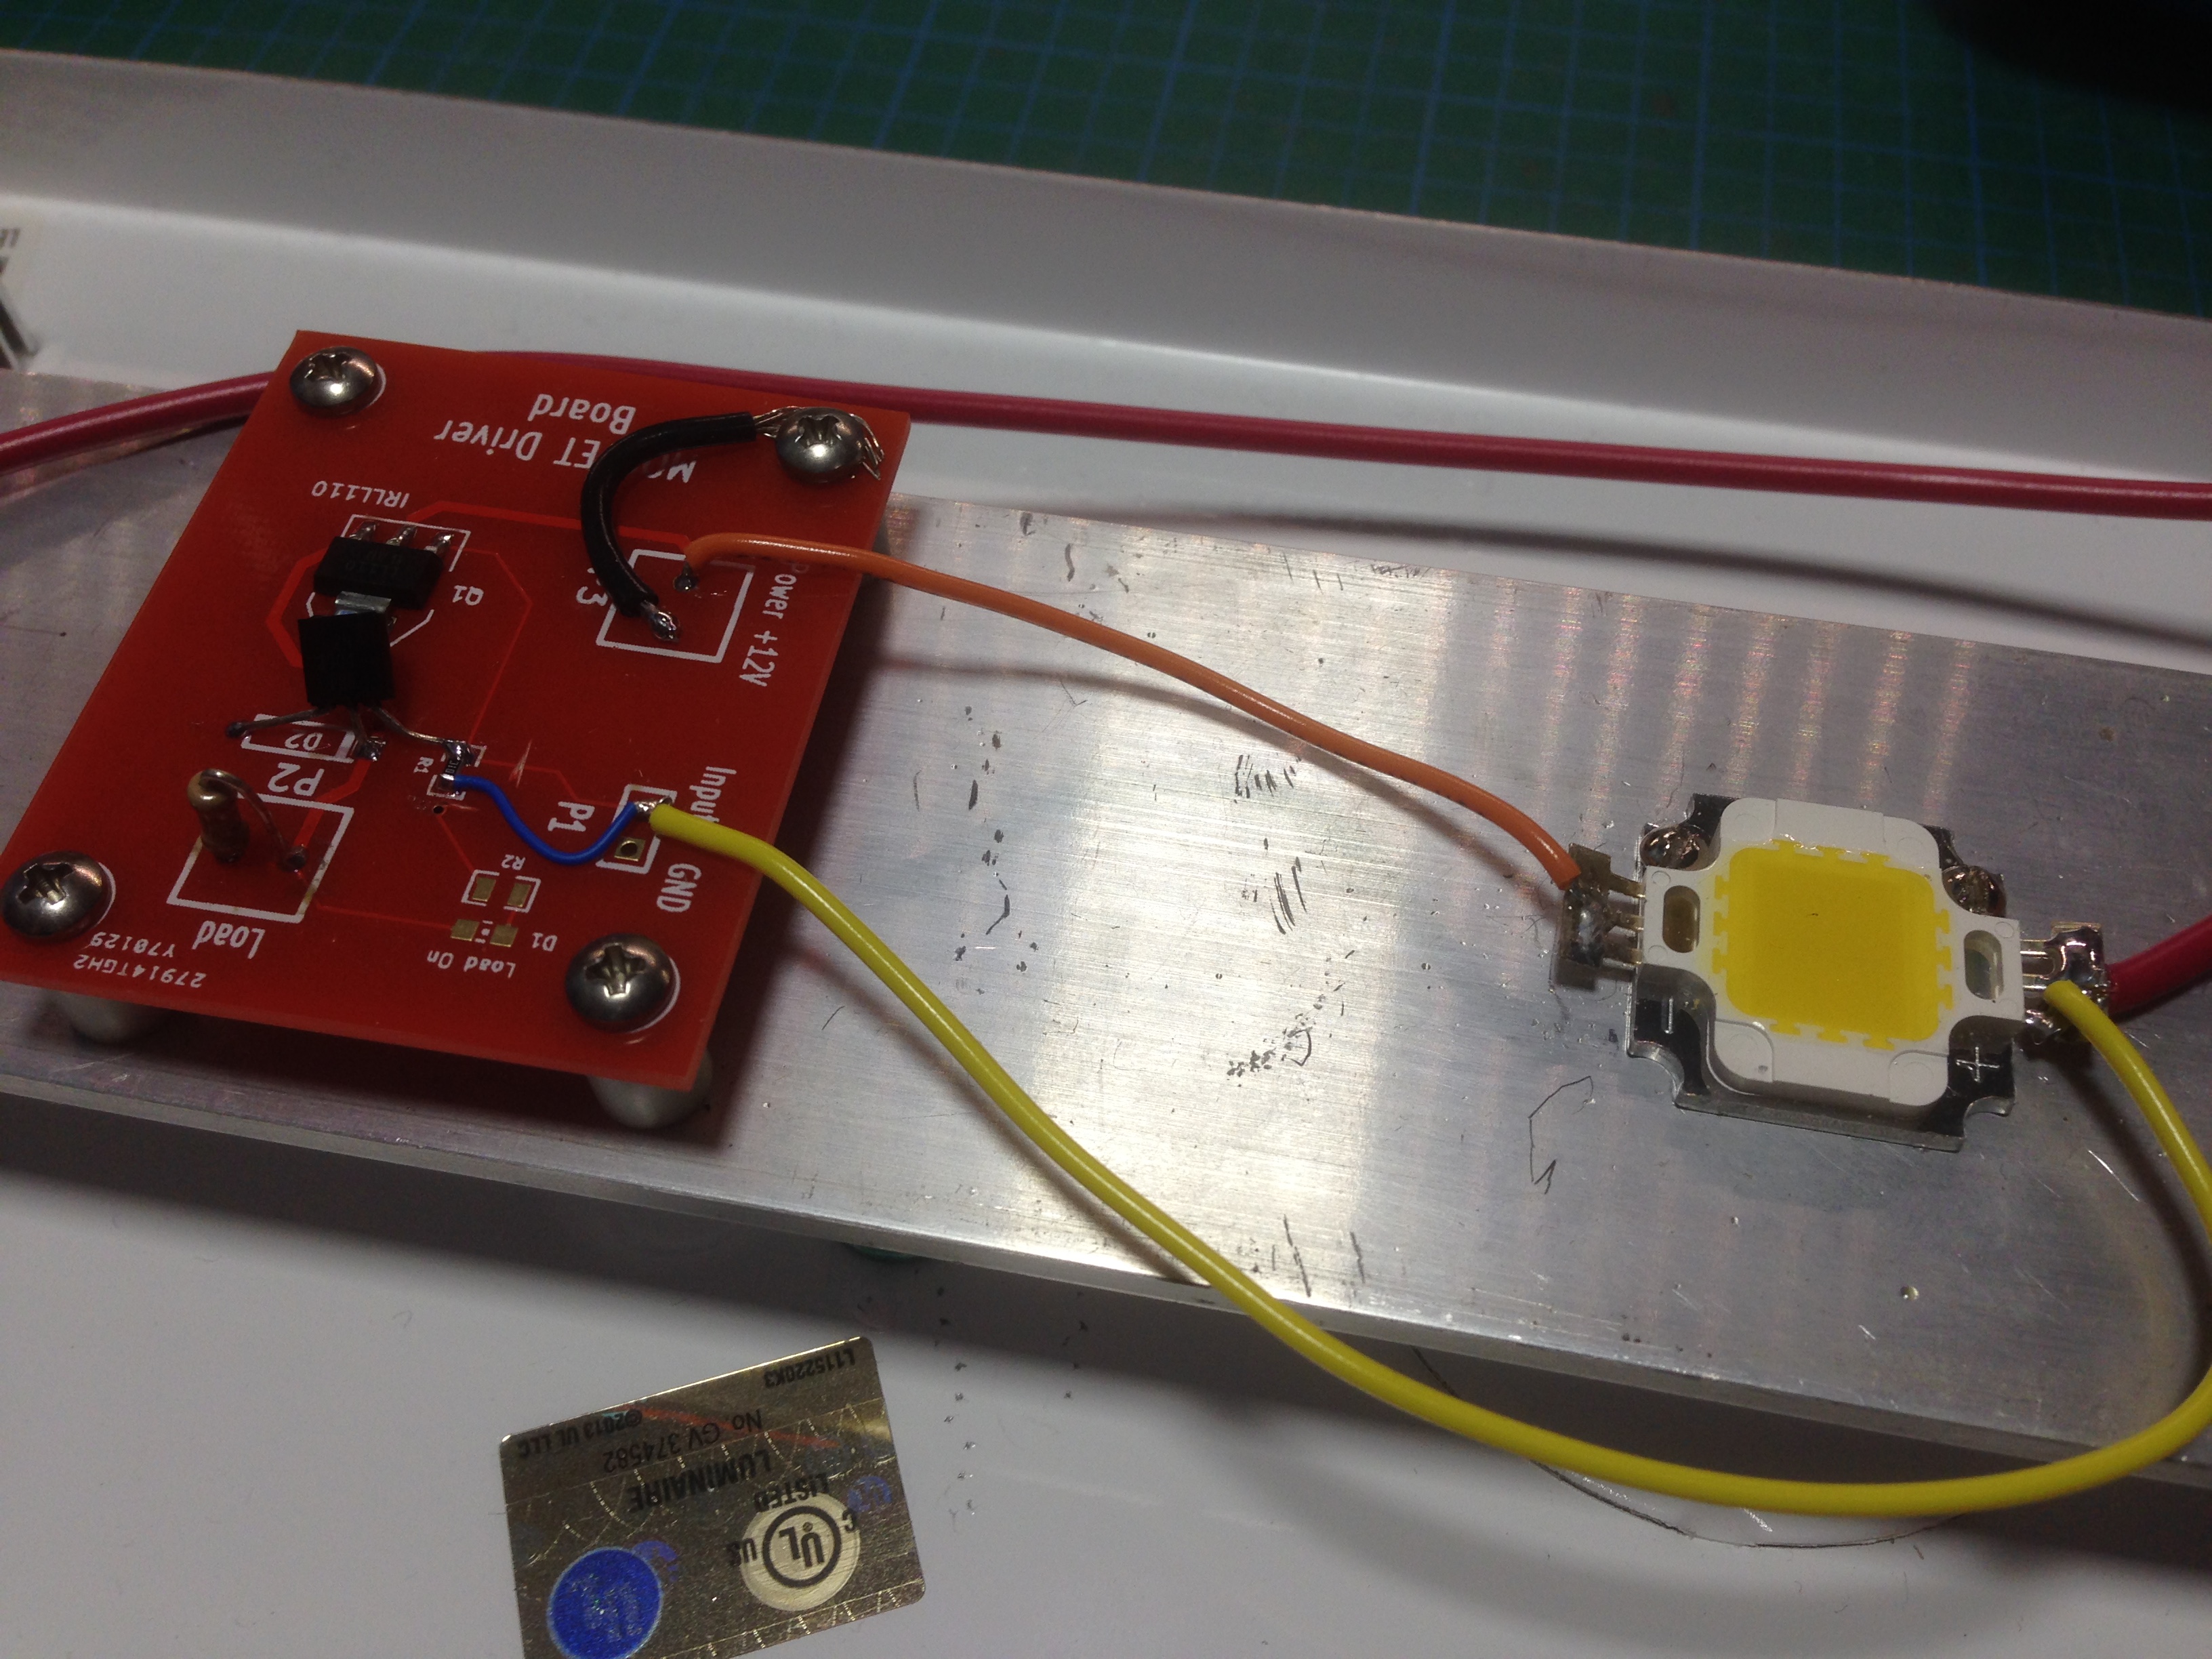
The PCB that I used was actually the first PCB that I ever designed, and it had an error so i never ended up using it. I modified the circuit on the PCB to accommodate the LED driver circuit above (reuse and recycle!).

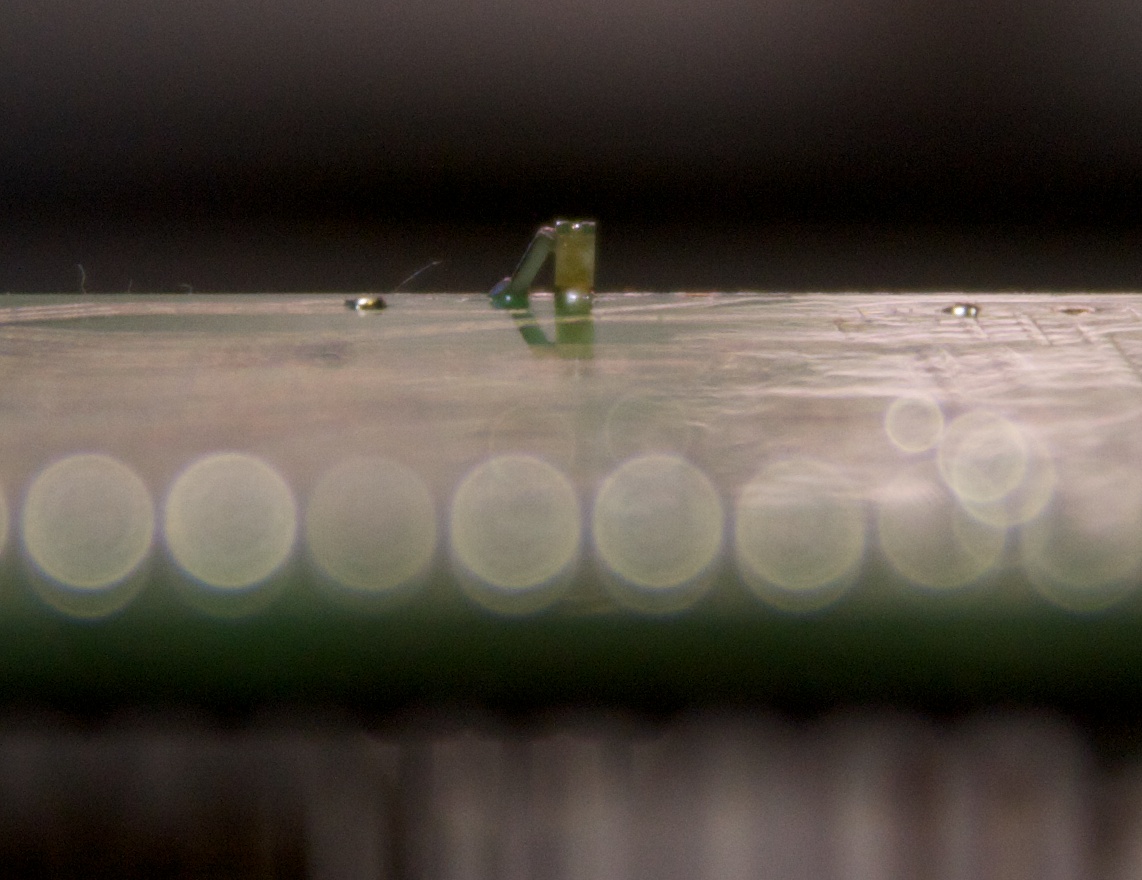
And from a different angle, showing the aluminum bar with the heat sinks under:

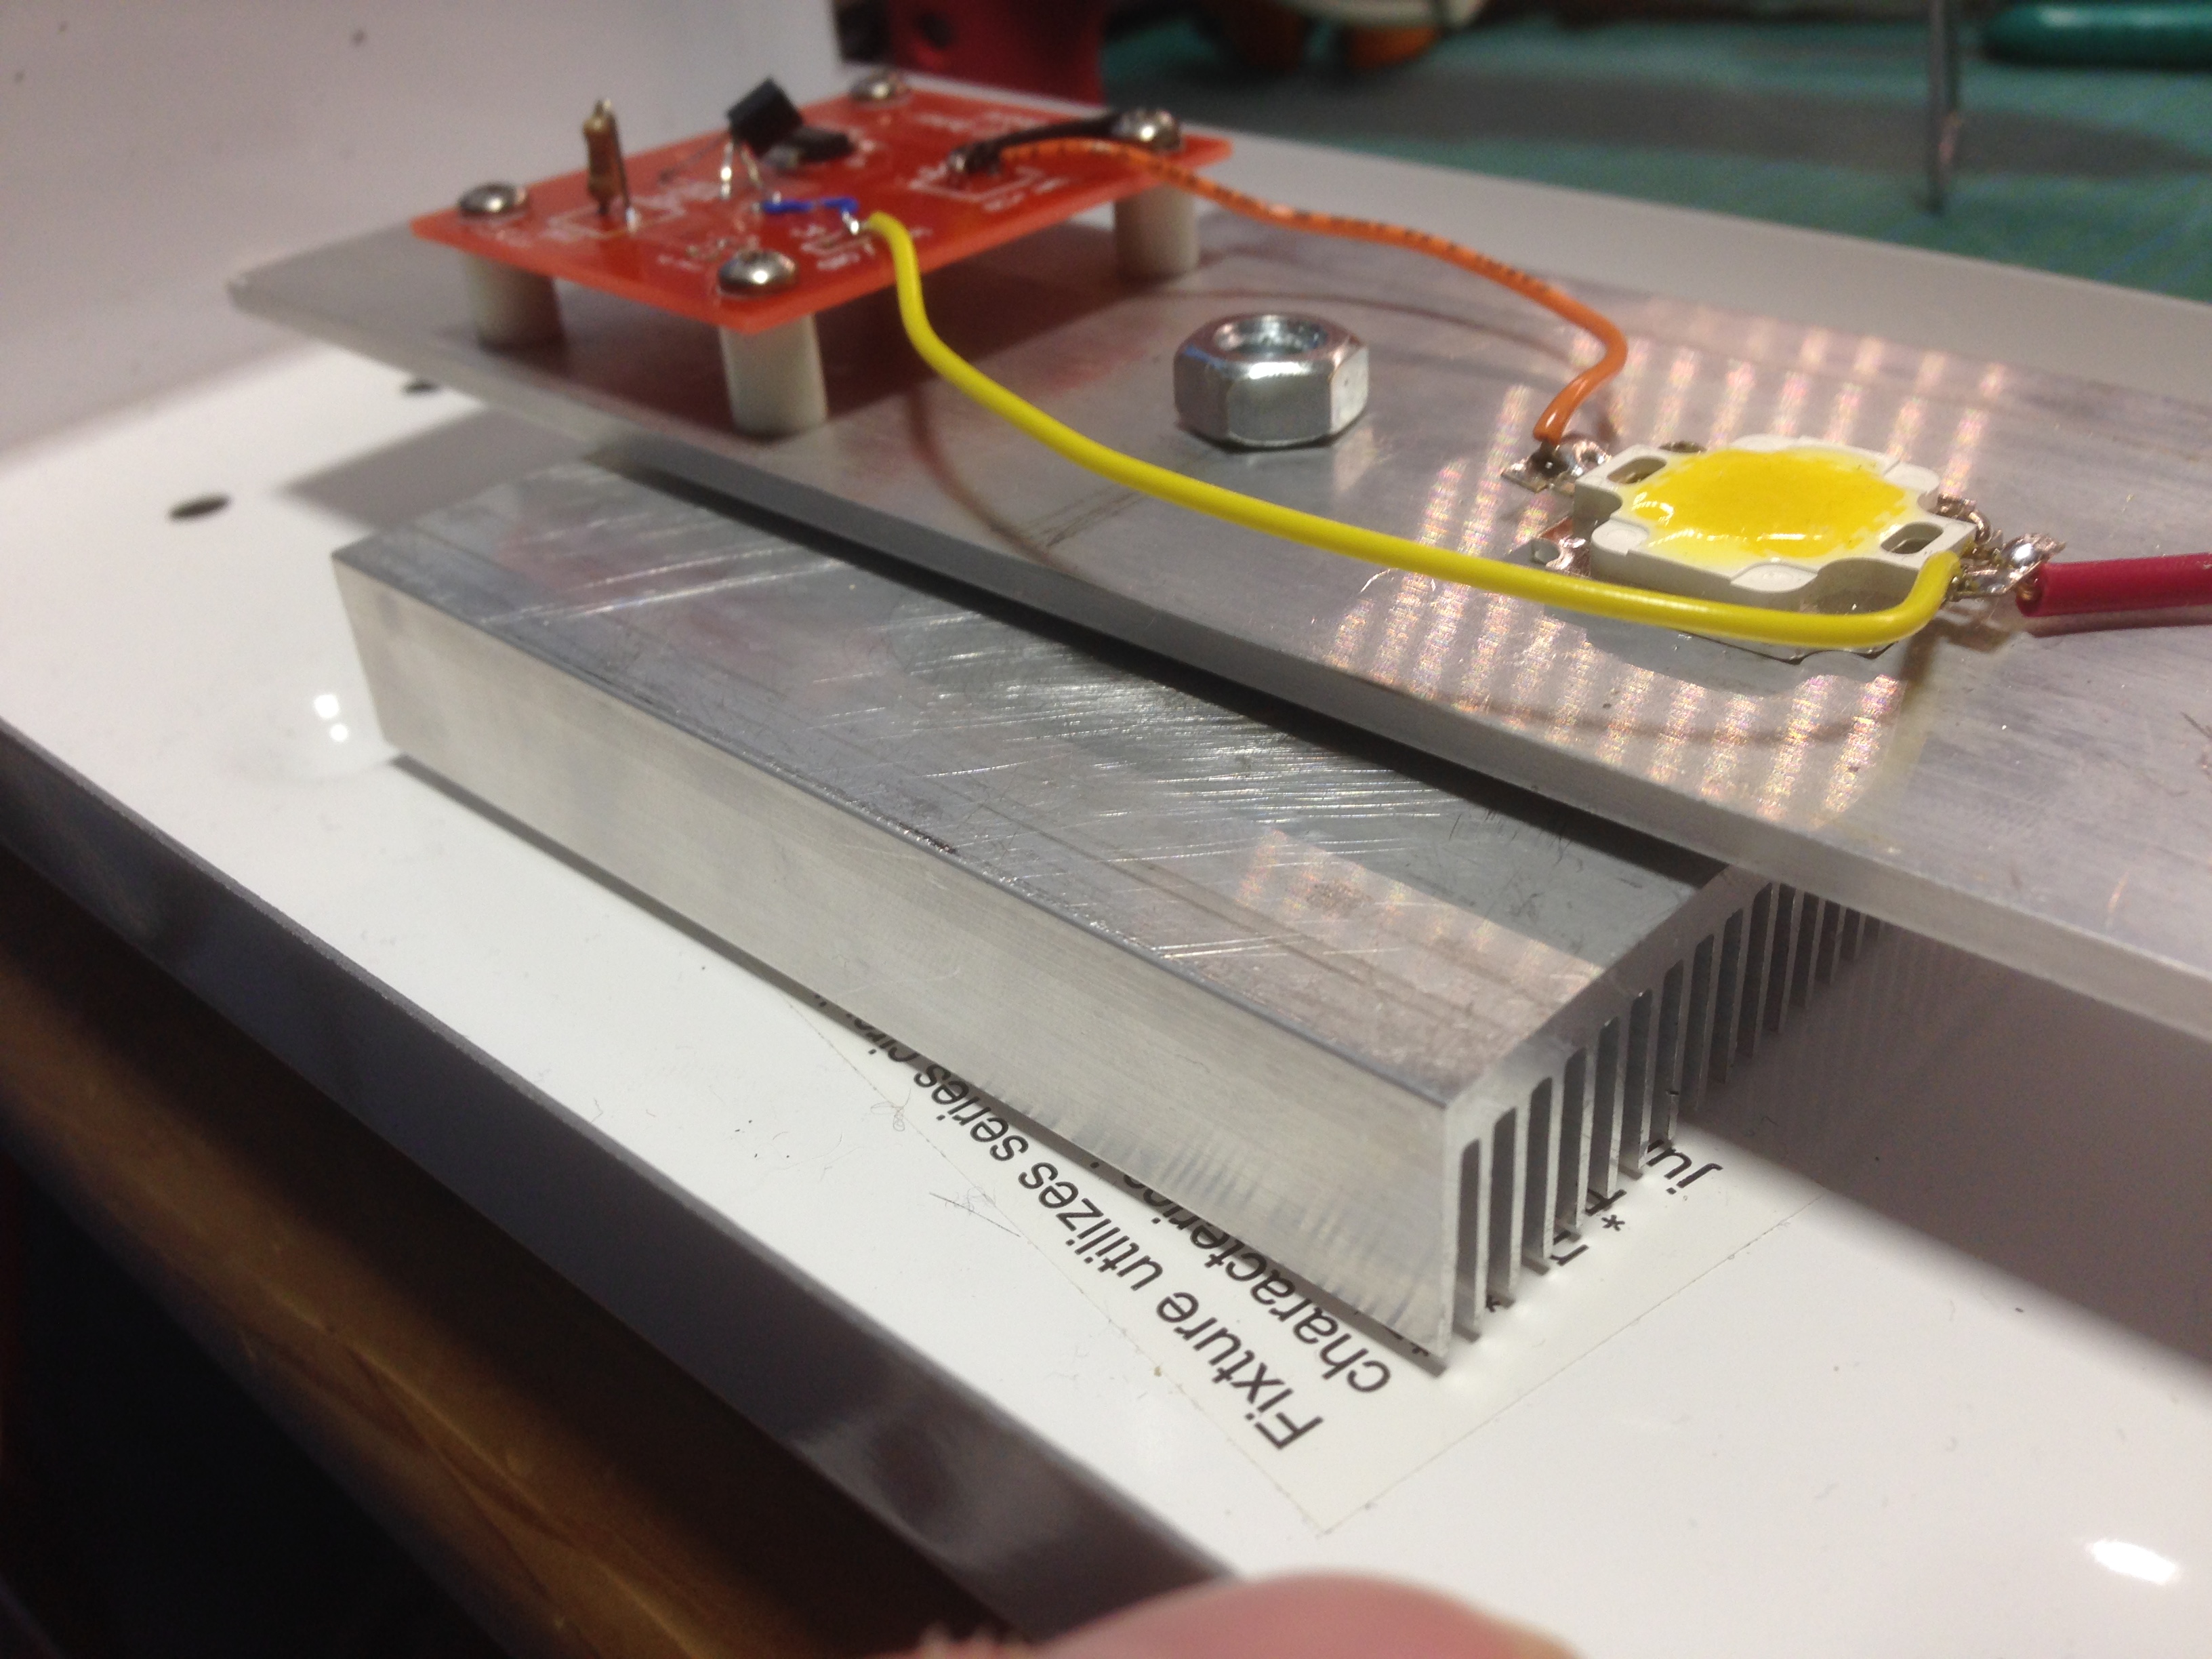
Originally I thought that it would be possible to thermal-paste and screw the main aluminum bar to the enclosure, but that didn’t work out too well in terms of height and clearances, so I added two big heat sinks (no idea what the specs are, they are “cheapie” ones from EBay). They do a good enough job, and the whole thing stays at a reasonable temperature as long as it is not left on for more than a few hours. Of note is that the heat sinks don’t make full contact with the aluminium bar; this will be fixed in the future, and I will be added a fan to the enclosure with some venting.

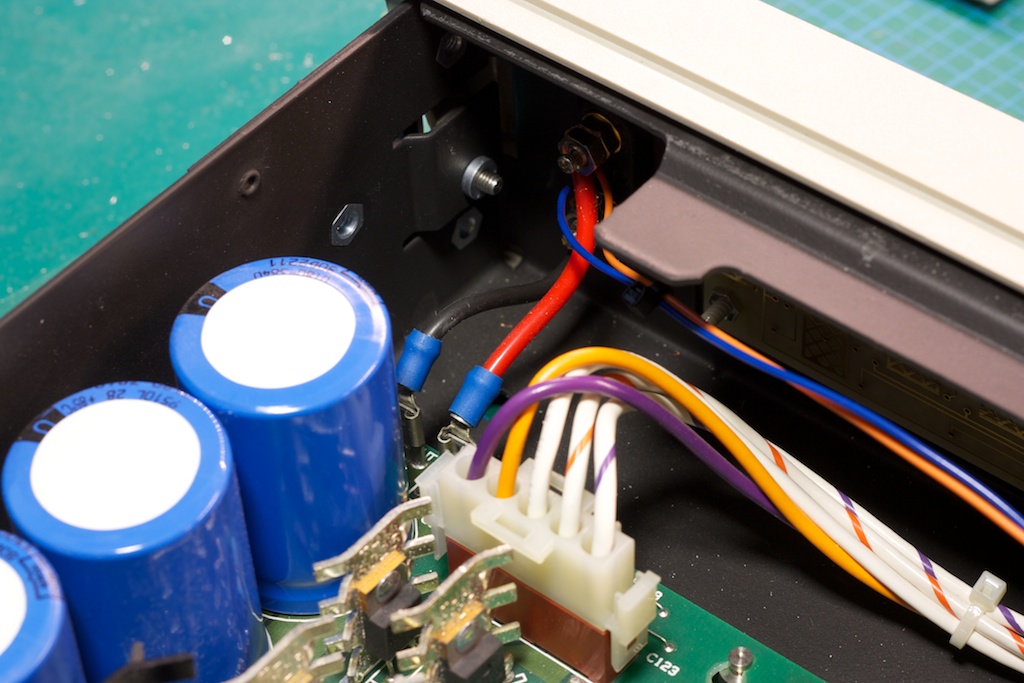
Here is a photo of the power input rectification and filtering board I put together:

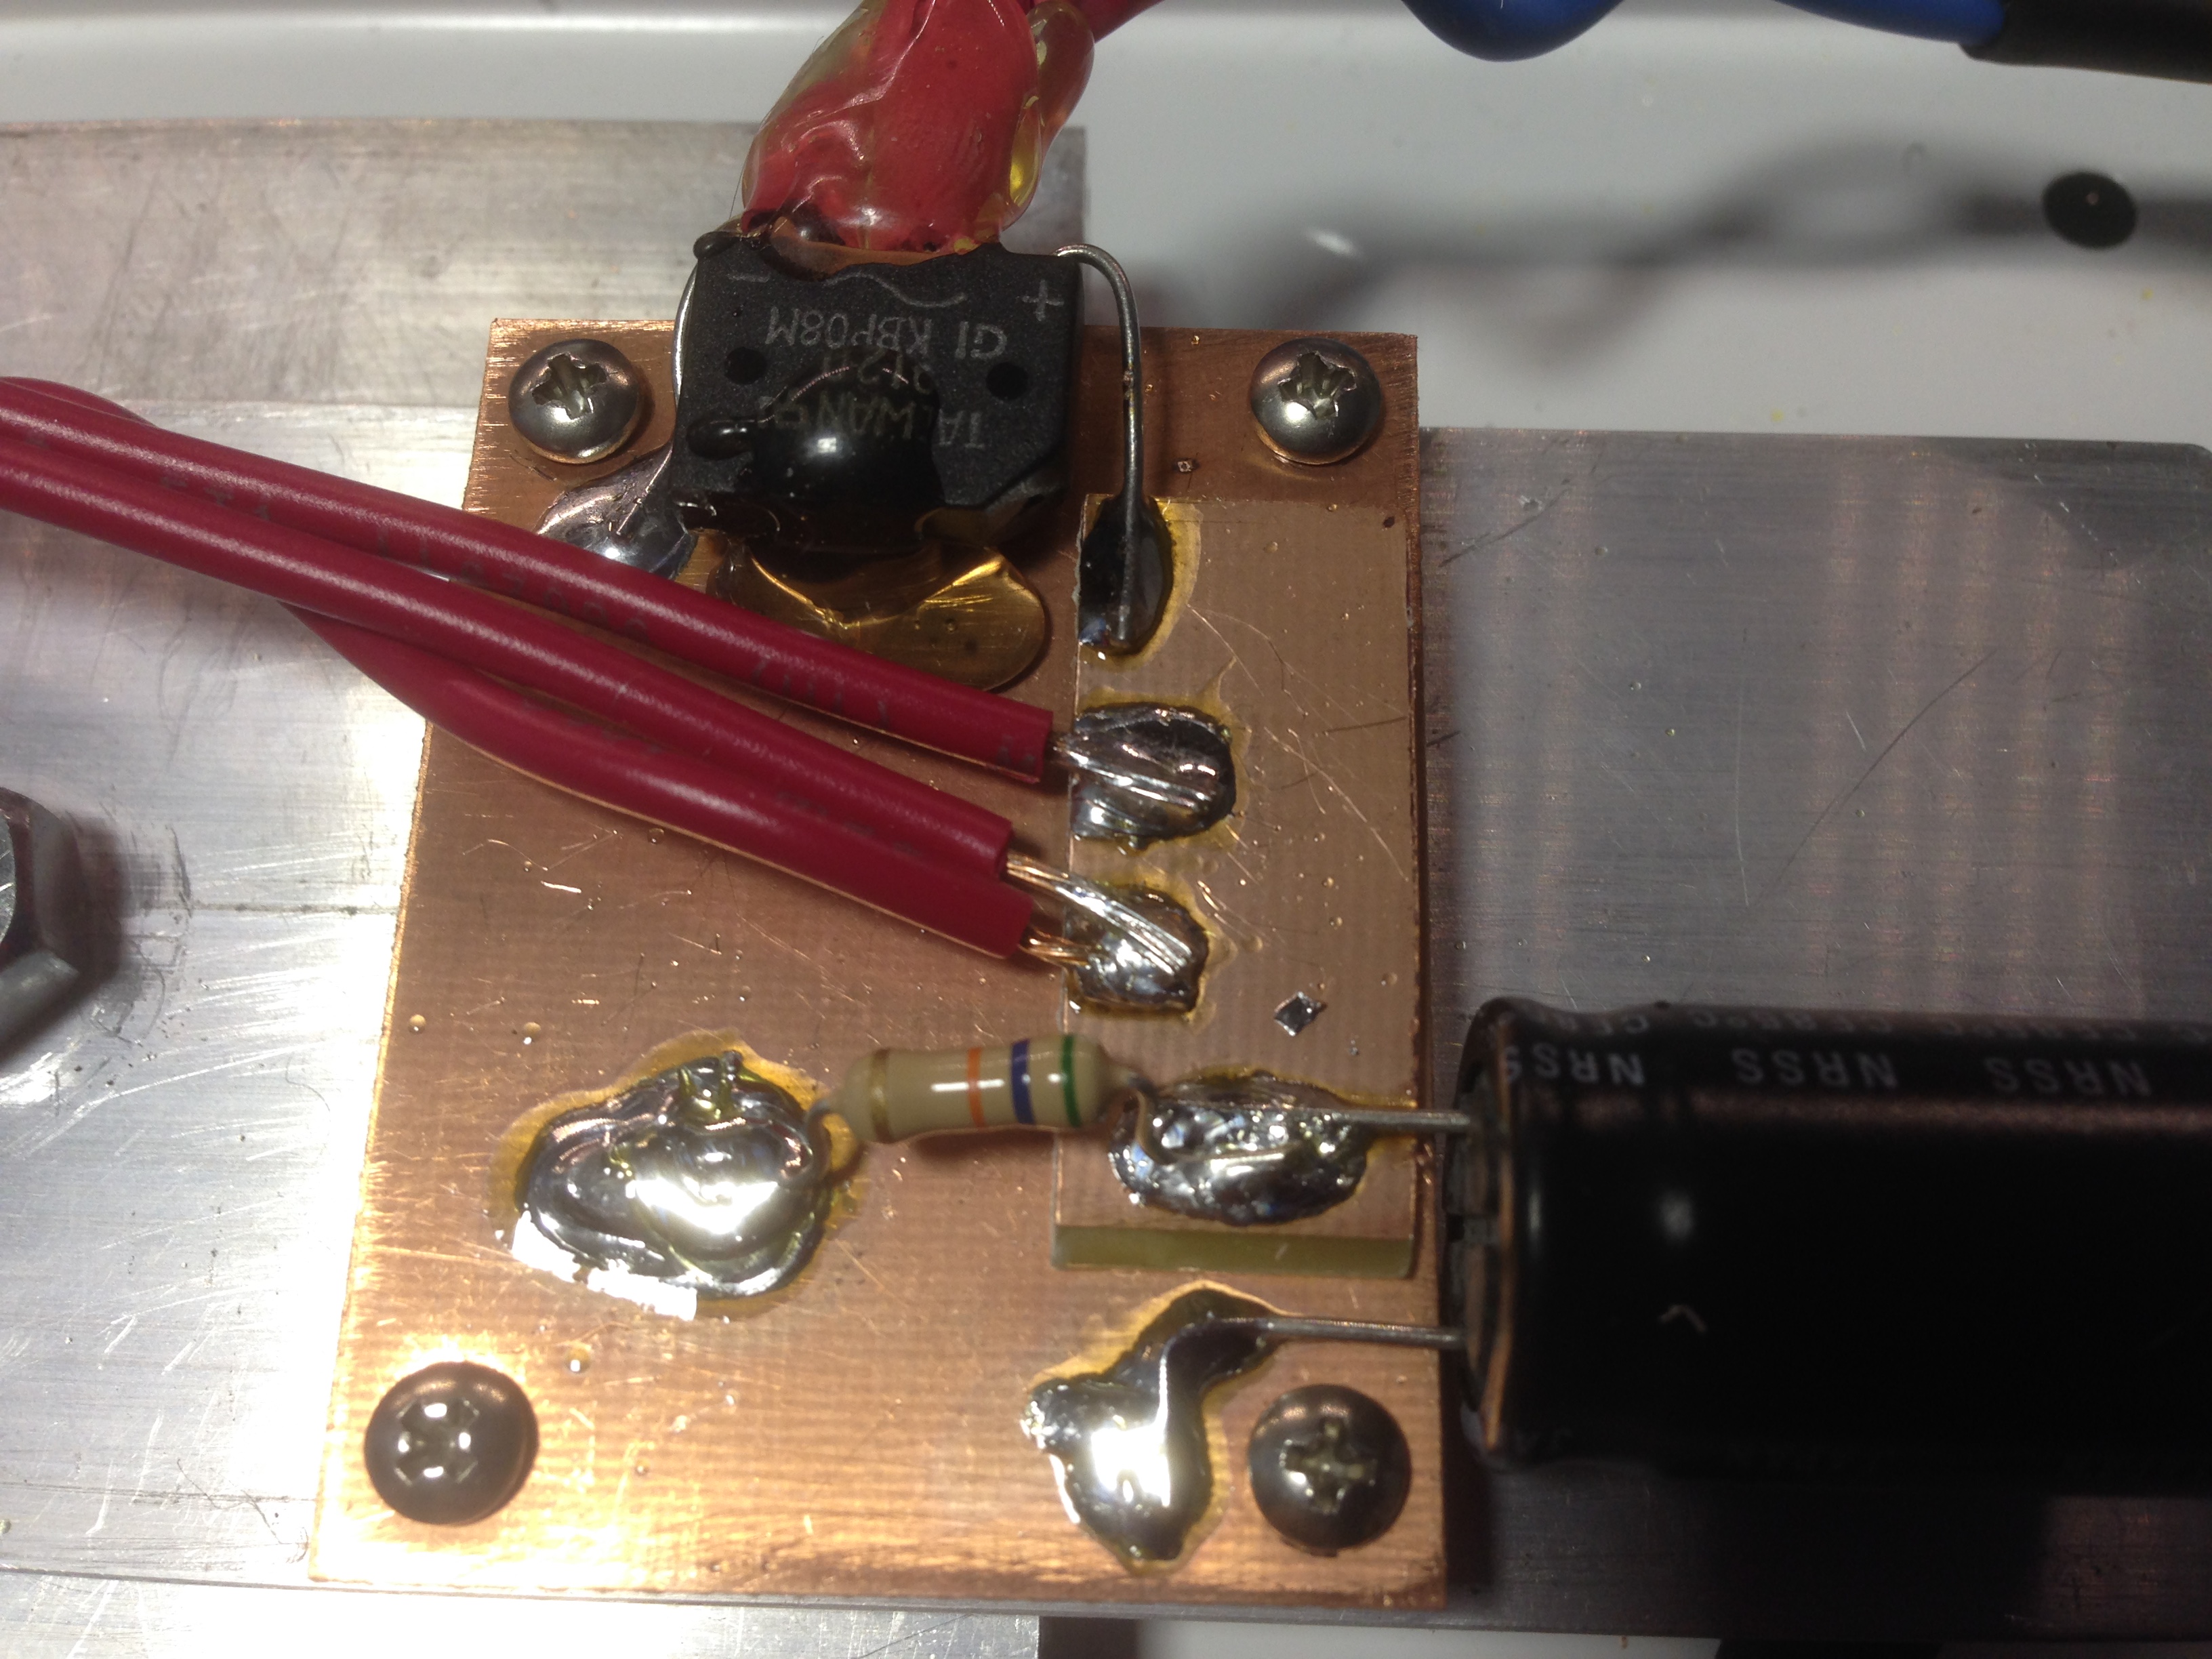
Note the 56 kΩ resistor soldered to the filtering capacitor in the foreground. I ran into a small problem that there was enough residual voltage across the capacitor after the lamp was turned off that caused some of the LEDs with lower forward voltage drops to stay lit. The resistor helps drain the capacitor quickly.

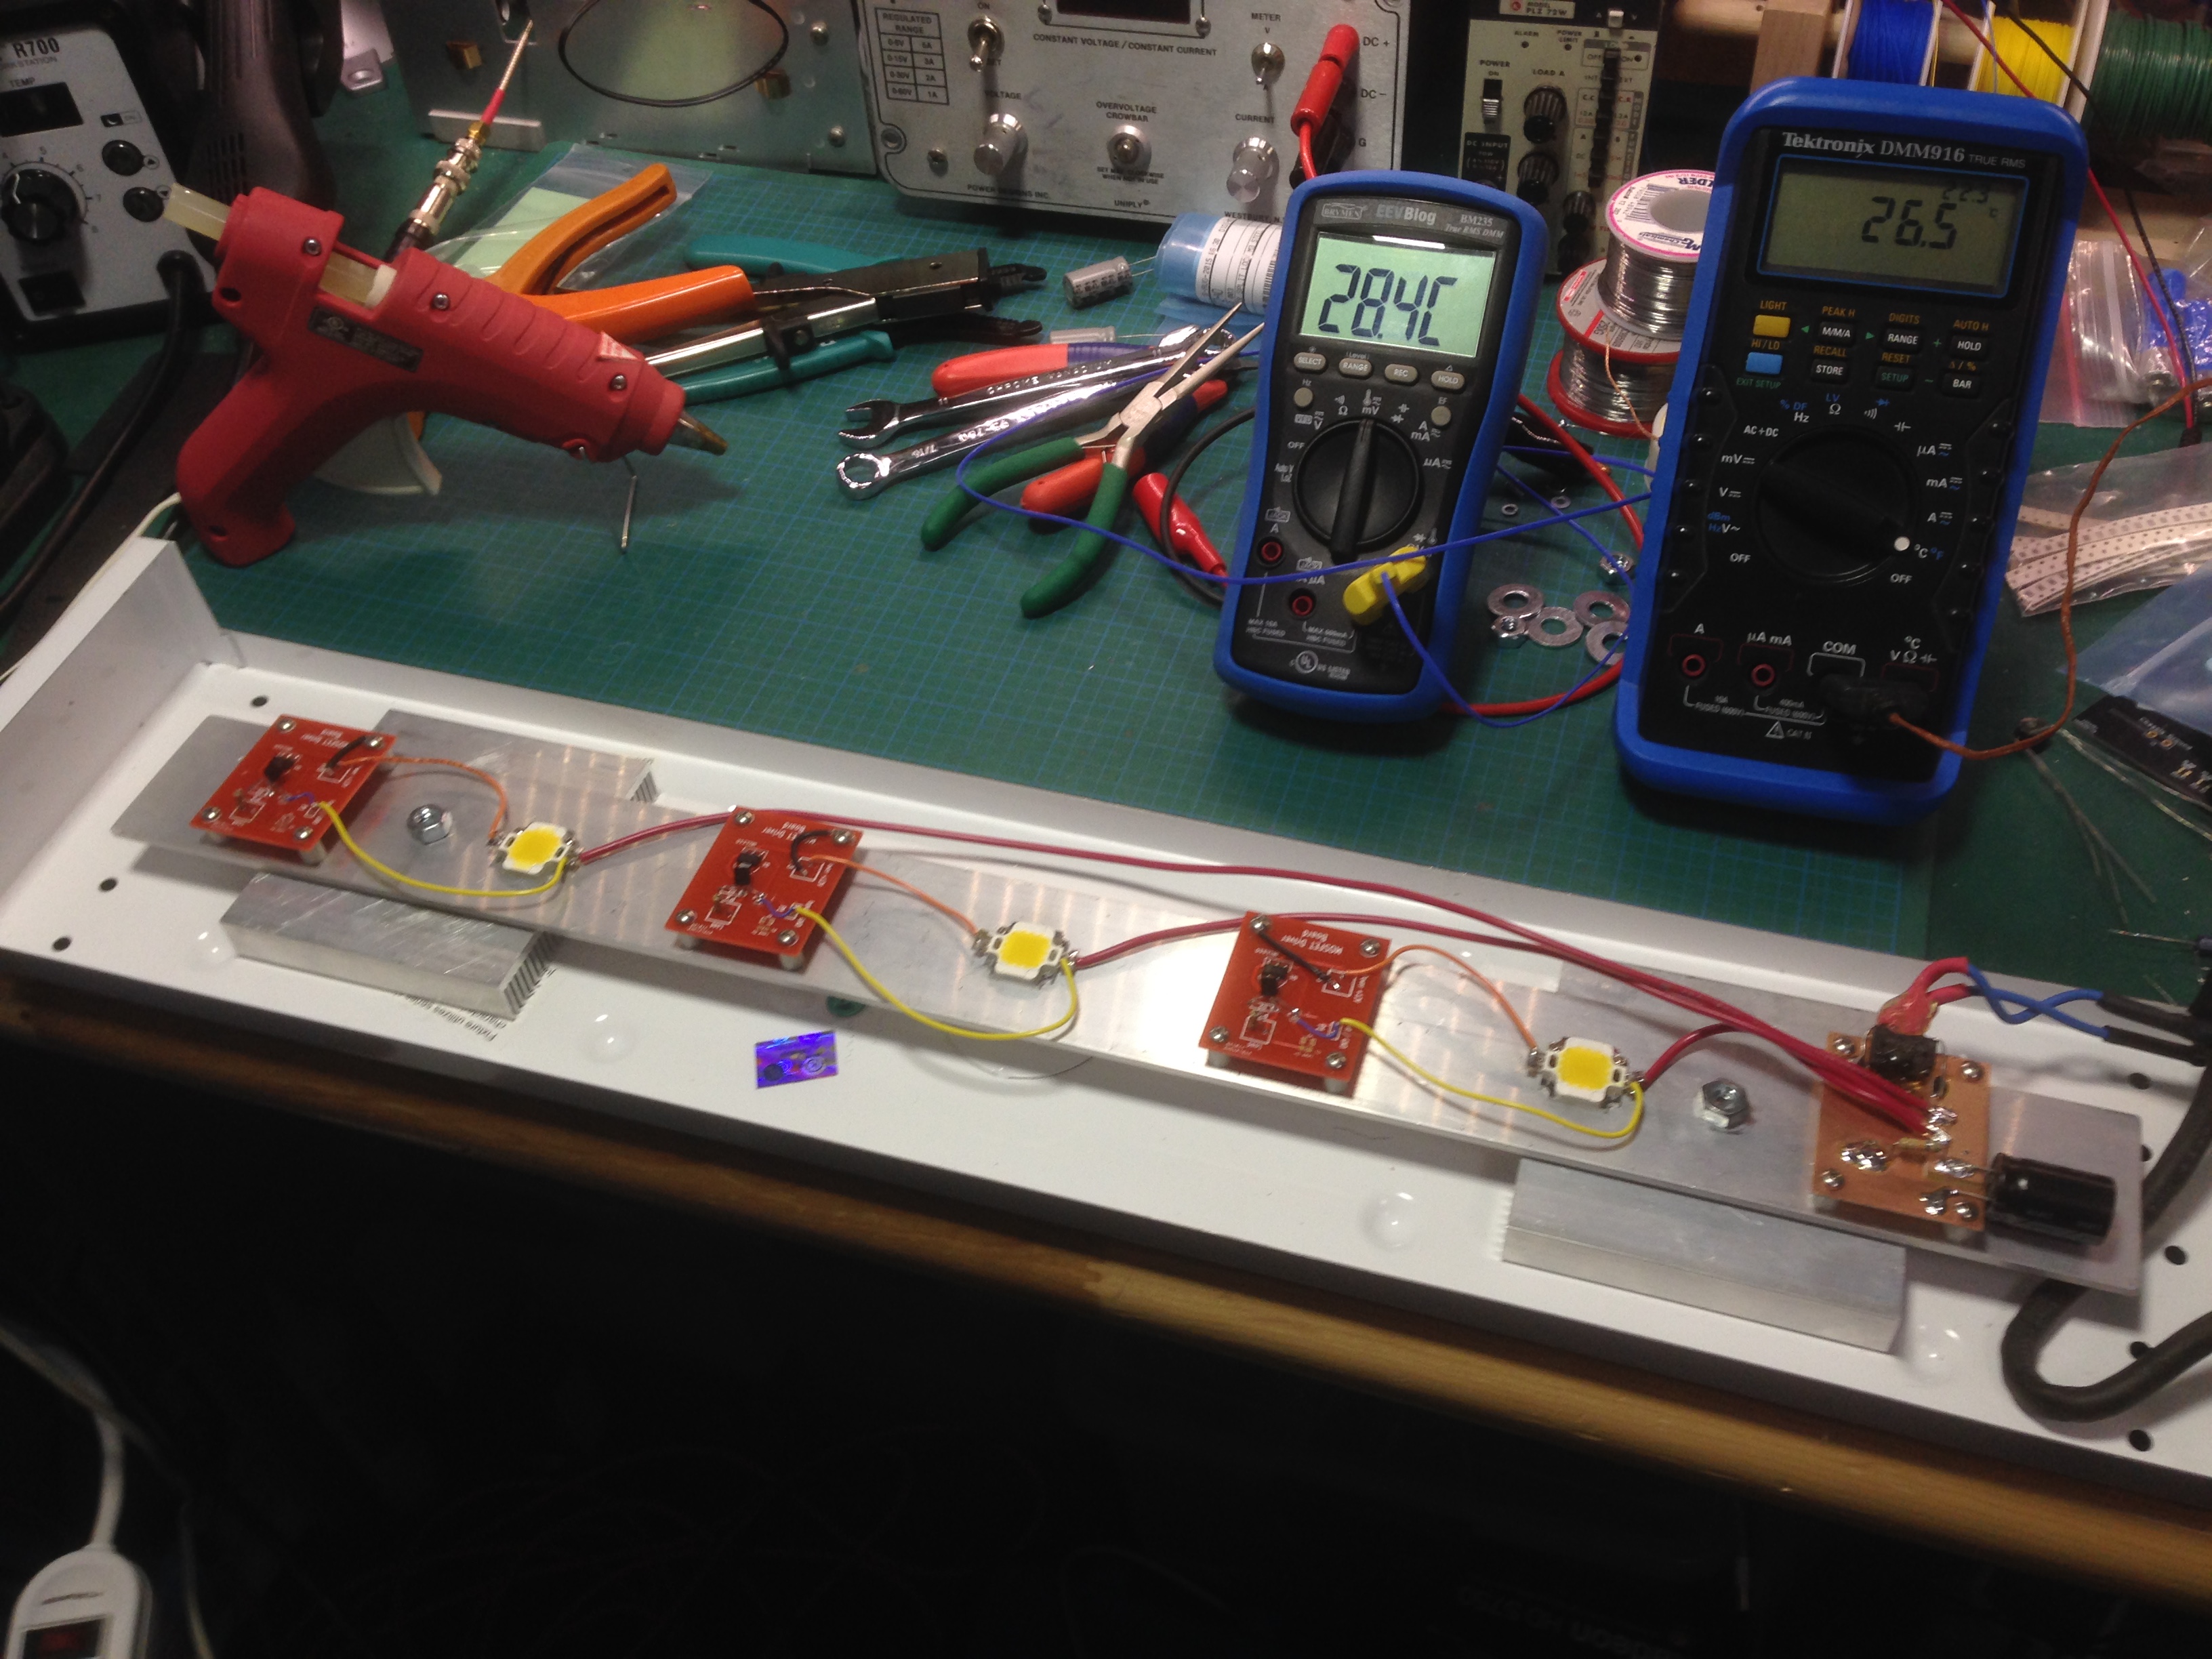
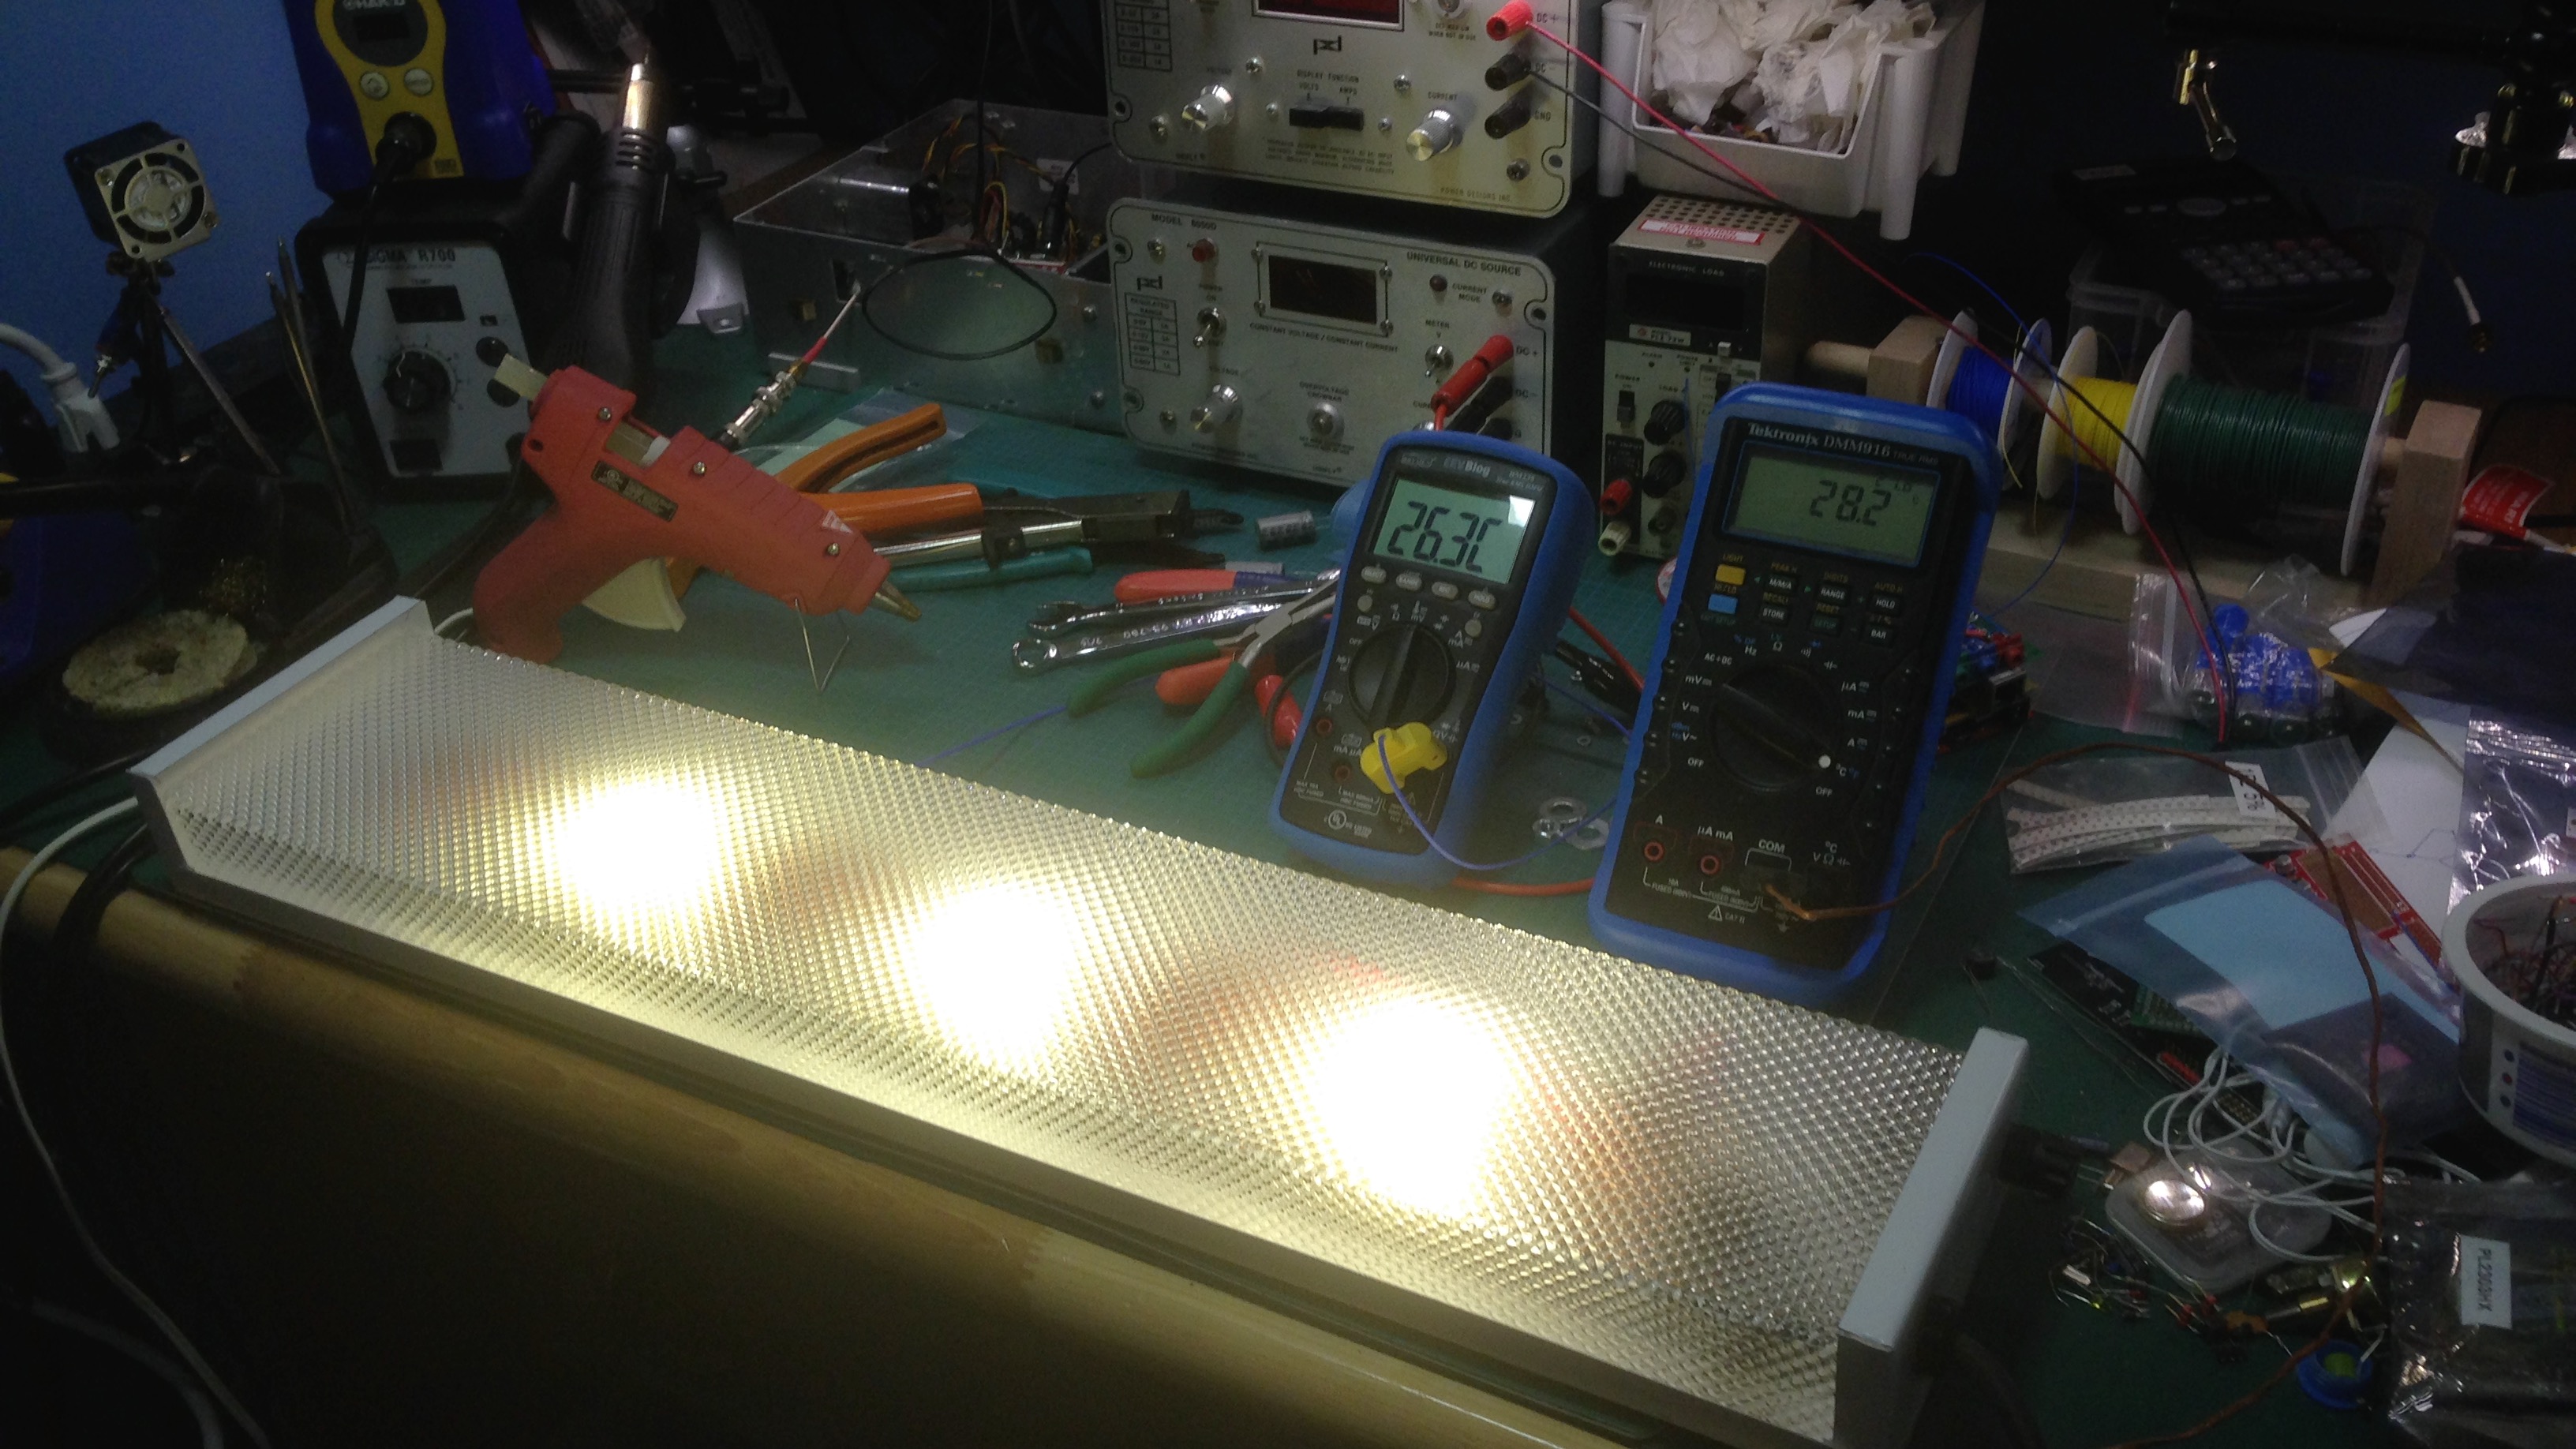
Here you can see the fully assembled unit on the electronics bench, plus a shot of it lit up during thermal testing:

And here is the final light mounted above my work bench in the garage:

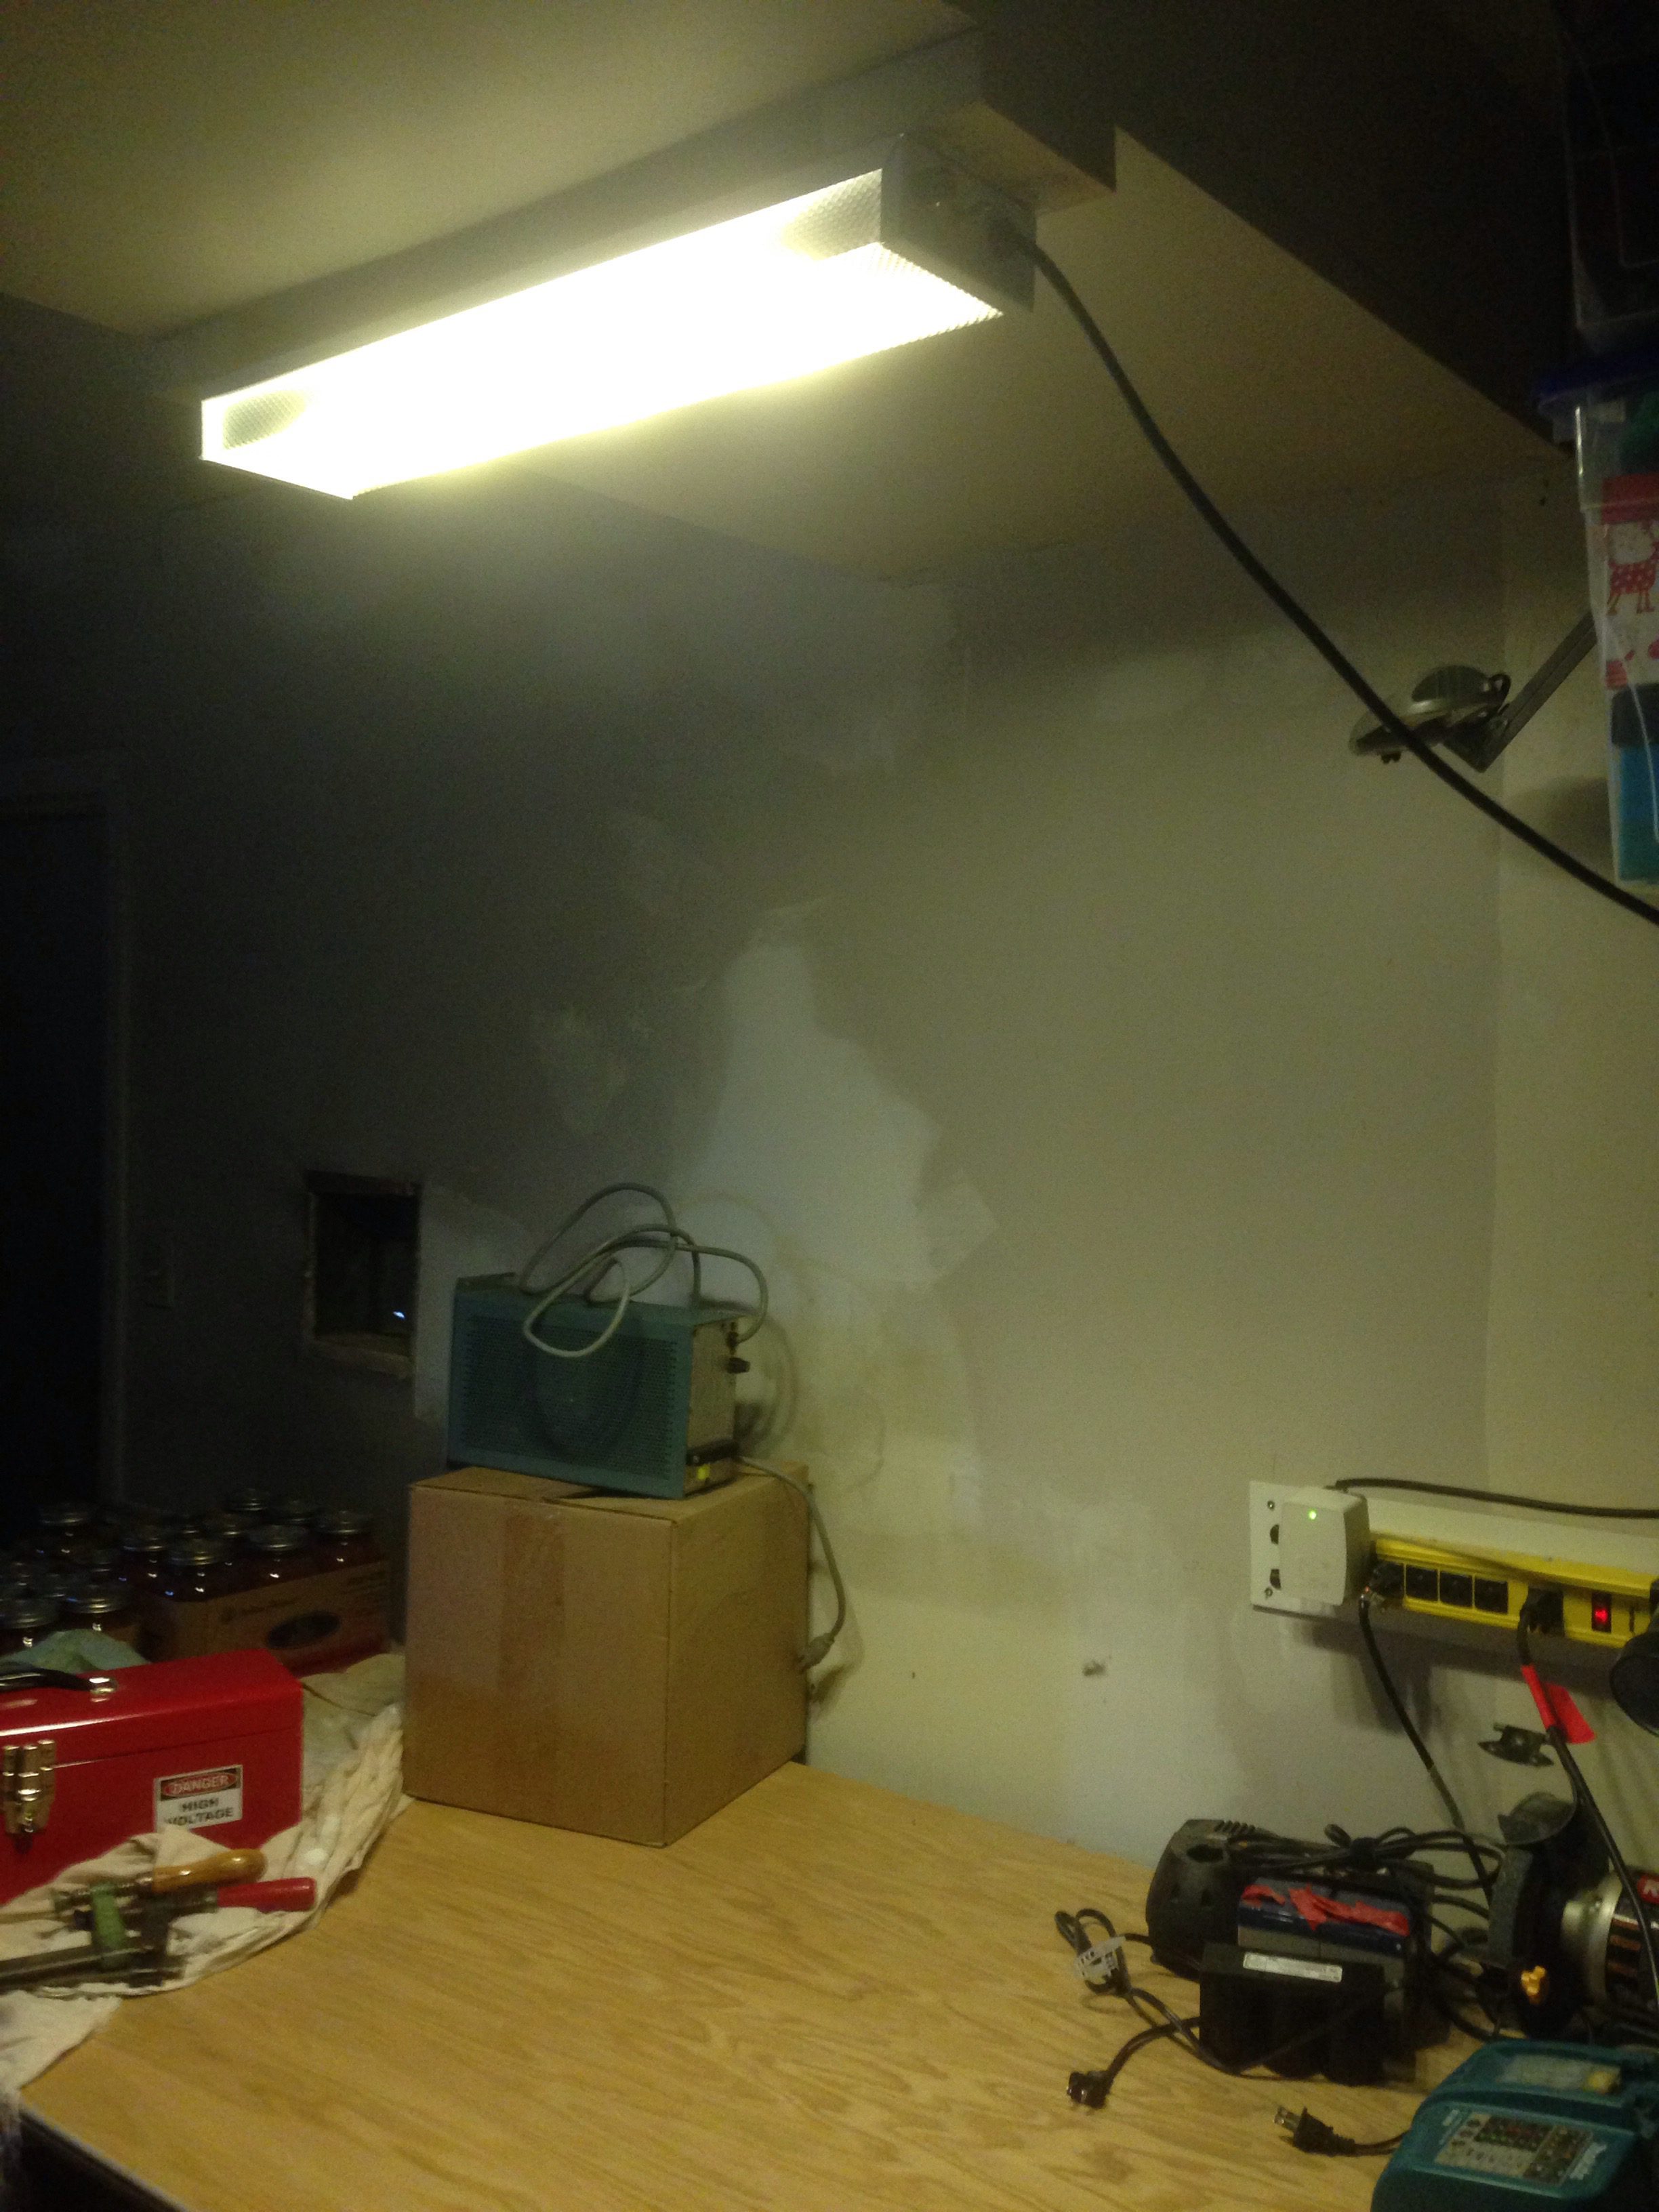
You can see in the back to the right the power bar with the AC adapter (right side of the power bar) that I used to power the light. It is a 24VAC unit (~27VAC without a load).

Measurements of the light output and power consumption will be performed and reported on in another post.

CoIDE, STM32F103 and Semihosting

I have been a little quiet lately as I have been working on a few projects. One of these are some experiments with the CooCox CoIDE and a STM32F103 dev board that I picked up off EBay a while back.

As a quick background, I have generated the bulk of the test project(s) with STM32CubeMX, and then modified what I needed. It should be noted that STM has updated the StdPeripheral library with a new HAL Library, which I decided to use. CoIDE has a neat feature called “semihosting” which allows you to shoot debug messages back to the IDE via the JTAG interface, freeing up the UART for your application-specific use.

The problem comes when adding semihosting. You need to add the “Retarget printf” component as well as the “Semihosting”. A quick implementation of PrintChar() in the semihosting code:

#include <semihosting/semihosting.h>
 
void PrintChar(char c)
{
  SH_SendChar(c);
}

If you try and compile this, you get the following error:

[cc] Starting link
[cc] arm-none-eabi-gcc -mcpu=cortex-m3 -mthumb -g -nostartfiles -Wl,-Map=cdctest.map -O0 -Wl,--gc-sections -LC:\CooCox\CoIDE\configuration\ProgramData\cdctest -Wl,-TC:\CooCox\CoIDE\configuration\ProgramData\cdctest/arm-gcc-link.ld -g -o cdctest.elf ..\obj\stm32f1xx_hal_rcc_ex.o ..\obj\semihosting.o ..\obj\stm32f1xx_hal_pwr.o ..\obj\stm32f1xx_hal_can.o ..\obj\stm32f1xx_hal.o ..\obj\stm32f1xx_it.o ..\obj\stm32f1xx_hal_dac.o ..\obj\stm32f1xx_hal_gpio_ex.o ..\obj\stm32f1xx_hal_wwdg.o ..\obj\stm32f1xx_hal_cortex.o ..\obj\stm32f1xx_hal_crc.o ..\obj\stm32f1xx_hal_iwdg.o ..\obj\system_stm32f1xx.o ..\obj\stm32f1xx_hal_rcc.o ..\obj\stm32f1xx_hal_dac_ex.o ..\obj\stm32f1xx_hal_adc.o ..\obj\stm32f1xx_hal_i2s.o ..\obj\stm32f1xx_hal_smartcard.o ..\obj\stm32f1xx_hal_pcd.o ..\obj\stm32f1xx_hal_uart.o ..\obj\usbd_core.o ..\obj\main.o ..\obj\startup_stm32f103xb.o ..\obj\stm32f1xx_hal_usart.o ..\obj\stm32f1xx_hal_nor.o ..\obj\stm32f1xx_ll_usb.o ..\obj\printf.o ..\obj\stm32f1xx_hal_spi_ex.o ..\obj\stm32f1xx_hal_cec.o ..\obj\stm32f1xx_hal_hcd.o ..\obj\stm32f1xx_hal_flash.o ..\obj\stm32f1xx_hal_gpio.o ..\obj\stm32f1xx_hal_dma.o ..\obj\usbd_desc.o ..\obj\usbd_conf.o ..\obj\stm32f1xx_hal_adc_ex.o ..\obj\stm32f1xx_hal_irda.o ..\obj\stm32f1xx_hal_sd.o ..\obj\sh_cmd.o ..\obj\stm32f1xx_hal_spi.o ..\obj\syscalls.o ..\obj\stm32f1xx_hal_i2c.o ..\obj\stm32f1xx_hal_msp.o ..\obj\usb_ctrl.o ..\obj\stm32f1xx_hal_eth.o ..\obj\stm32f1xx_ll_fsmc.o ..\obj\usbd_cdc.o ..\obj\stm32f1xx_hal_rtc.o ..\obj\stm32f1xx_hal_tim.o ..\obj\stm32f1xx_hal_flash_ex.o ..\obj\usbd_ctlreq.o ..\obj\stm32f1xx_hal_pcd_ex.o ..\obj\usbd_cdc_if.o ..\obj\stm32f1xx_hal_nand.o ..\obj\usbd_ioreq.o ..\obj\stm32f1xx_hal_pccard.o ..\obj\stm32f1xx_hal_sram.o ..\obj\usb_device.o ..\obj\stm32f1xx_hal_rtc_ex.o ..\obj\stm32f1xx_hal_tim_ex.o ..\obj\stm32f1xx_ll_sdmmc.o -lm -lgcc -lc
[cc] c:/program files (x86)/gnu tools arm embedded/5.3 2016q1/bin/../lib/gcc/arm-none-eabi/5.3.1/../../../../arm-none-eabi/lib/armv7-m\libc.a(lib_a-impure.o):(.data._impure_ptr+0x0): multiple definition of `_impure_ptr'
[cc] ..\obj\printf.o:(.data+0x428): first defined here
[cc] collect2.exe: error: ld returned 1 exit status

It turns out that after a lot of googling, pulling out of hair and cursing, the answer is rather simple. It seems that the struct “r” and “_impure_ptr” are being redefined in printf.c; so we just need to comment them out from the printf.c file in our project:

#include <semihosting/semihosting.h>
 
void PrintChar(char c)
{
	SH_SendChar(c);
}
 
/** Required for proper compilation. */
//struct _reent r = {0, (FILE *) 0, (FILE *) 1, (FILE *) 0};
//struct _reent *_impure_ptr = &r;
 
...

Rebuild and problem solved.

PCBs in the Wild!

I have been working on a couple of prototyping boards for general “hey I need a PCB for this oh I have one here” type of projects. Since I’m working more with Surface Mount Technology (SMT) these days and have more of those part in my “stock”, I designed some prototyping boards with this in mind:

PMWVqK05NScwOySx7d_rqpRDDEQCtxBRgKVb5fMP5_Y

w8qOk0l8Cf6-VvLJCz_le5dyH_54Me0o0eiwX4rdkM8

I have sent a few of these to some people that I chat with on the #eevblog IRC channel, and one of them was kind enough to send me an “action shot” of a little LED-based project he used my PCB for!

WP_20150906_16_12_12_Pro

And another one from c4757p:

pcb-in-the-wild-2


Power Designs Inc 6050C Display Mod

Here’s a modification that I have been meaning to do for a while. It involved replacing the PCB in one of my power supplies with a modified version designed by me that upgraded the size of the 7-segment LED display.

IMG_5736

I ordered the board from OSHPark. My experience with them has been positive; the turn around time was about 2 weeks and the gold finish is very nice. I’m fine with the colour of the solder mask, however note that the mask is a matte finish rather than the typical “pearl” or “glossy” finish that I am accustomed to seeing on PCBs. Not a big deal, but something to think about. Also, the traces are a bit difficult to see through the solder mask.

IMG_5737 IMG_5739 IMG_5741

I of course did not fully check my notes when throwing together the schematic for this project which resulted in the boards I received having the ‘a’ and ‘g’ segments reversed. A few cut traces and a jumper wires later and all was working as expected.

IMG_5745 IMG_5744  IMG_5742IMG_5743

I originally tried to think of a better way of re-attaching the new display board to the existing display measurement/logic board, but in the end the simplest solution won out and  I just re-soldered the new display board back. The header pitch is 3.81mm and was a total pain to find (yay eBay!).

IMG_5746

The end result is a bright, clear and LARGER display. Here I have contrasted it with the model right after the 6050C, the 6050D which has a larger digital display (and also does not display the measurement mode as the 6050C does, E or I).IMG_5748If I decide to pick up any more of these supplies, I think I’d make the same display modification to them as well. I have been looking at the 6050A models (which can usually be had for cheaper): these might also be good for a “digital makeover” involving removing the analog meter and designing a new digital display PCB.


Tektronix DMM 916 Back-light Mod

In keeping with the theme of back-light mods, I have another one here for you all. Recently I was able to get my hands on a well-loved (read: had the piss kicked out of it) Tektronix DMM 916. The specs are nice:

  • 4.75 digits
  • 40,000 count
  • Basic DC accuracy of 0.06%+1 count

The only problem which I didn’t know until I got the meter in my hands was that the back light was horrible:

IMG_5669

Wait, where is that back-light?IMG_5671

Still can’t see it? Turn off the lights!IMG_5670

I’m not sure if this is “factory standard” or just a sign of the age of the unit, but either way it needed some change. The first thing I did was to open up the meter and check out the display:

IMG_5675

There is a small slot on one side of the display assembly where the lamp bulb pokes into the light pipe. At first I thought I might use a standard through-hole LED, but realized that I wouldn’t be able to mount it without either cutting the trace (for the limiting resistor) or cutting the display. I didn’t want to mod the board, in case I or someone else wanted to restore it back to a incandescent bulb. So I choose to use a SMD chip LED and resistor, and build it “tee-pee” style on the top of the display PCB, so that the LED and resistor would stick up vertically into the display light-pipe recess:

IMG_5679

The LED is blue, Digikey part number 475-2816-1-ND with a 270ohm current limit resistor. The bulb sank about 20mA while the LED uses ~18mA, so a bit more efficient. I’m still not sure about the blue, but I figured it matches the theme of the case, so why not:

IMG_5680

And as is evident, it is much brighter even with the lab lights on. Curiously, it is not much more legible in the dark in terms of the digits on the screen as I would have thought.

HP8642B Signal Generator Mod

A quick mod post here. I saw this post by Kerry Wong, and having the same hardware myself (and finding the backlight ridiculously dim) I thought this mod was a great idea and wanted to try it myself. First, here is a shot of the original backlight:

HP8642B-OrigBL

I pulled the front panel apart, and decided to use white SMD LEDs for my replacement mod:

IMG_5664

After soldering up everything and reassembling (and of course cursing a lot due to the number of defective white LEDs that I didn’t realize that I had), the result is beautiful!


HP8642B-Mod

And here is the same Easter egg that Kerry found (hold down the MSSG key while powering on the unit):

HP8642B-ModBL1


Function Generator Shenanigans

So my problem turned out to be not the saving of the status of the HDG2002, but actually doing the following:

  • Go to Utility, select System Status
  • Toggle the “Startup” option to “Last” (to set the function generator to restore to the last setup before power-off I assumed!)
  • Exit back to the main channels screen
  • Power Cycle the generator using the power button on the front panel.

When the HDG2002 reboots, POOF! No more main screen after the Hantek logo briefly flashes on screen. So what happened? It turns out that the problem is actually that the BACKLIGHT is set to level 0 by doing the above procedure. I found this out by logging into the serial console and finding the /dso/app directory. In here, there are a couple of “test” binaries:

test_beep
test_bkl

I tried them both but the test_bkl was the interesting one. When I ran it with the following options:

./test_bkl on 105

Poof the display popped back on! Of course on reboot it turned back off again. So after temporarily re-enabling the backlight, I went back into Utility -> System Status -> Startup and set it to Default, power cycled and boom, back in business no worries.

Well I guess there are still a few bugs in the firmware.  Please note that you can run into this bug REGARDLESS OF WHETHER YOU CRACK THIS FUNCTION GENERATOR OPEN OR NOT, and it has nothing to do with modifying the HDG2002. Except that if you don’t crack it open after you do this, you seemingly have no way to recover.

Hope this helps someone else!

Signal Generator

This is an acquisition that I purchased earlier in the year (a great bargain off EBay!).

IMG_5570

I decided to have a look inside it (not having any clue what goes into a function generator of this caliber.

IMG_5569 IMG_5572

Nice idea of putting the wiring schematics on the cover of the unit, as that way one can always figure out how to put the whole thing back together. And then I saw this:

IMG_0807

Wow.  So I decided to save a deeper dive into the unit for a later date. I built a stand for the generator and called it a day.

IMG_5574 IMG_5576 IMG_0810 IMG_0809